Jump to content
  • Sing.Salon was launched one year ago in August 2016. I am happy to report that the site is growing nicely ever since, especially during the last months. The site now has more than 500,000 page views every month.  
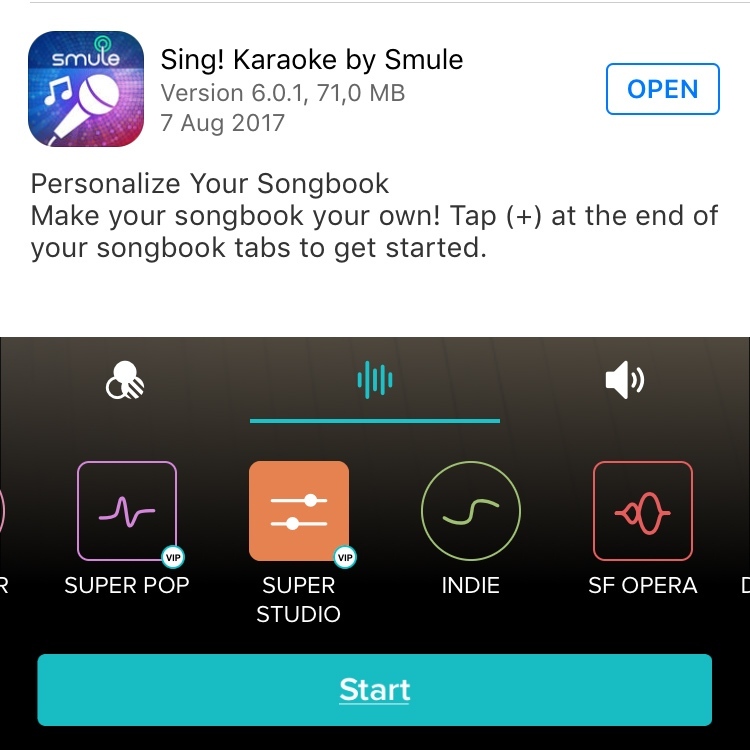
    Articles, frequently asked tech questions, microphone directory, group directory, competition directory, interviews, partner artists … No other place on the internet gathers this much useful information and knowledge around Smule and Sing! app.  
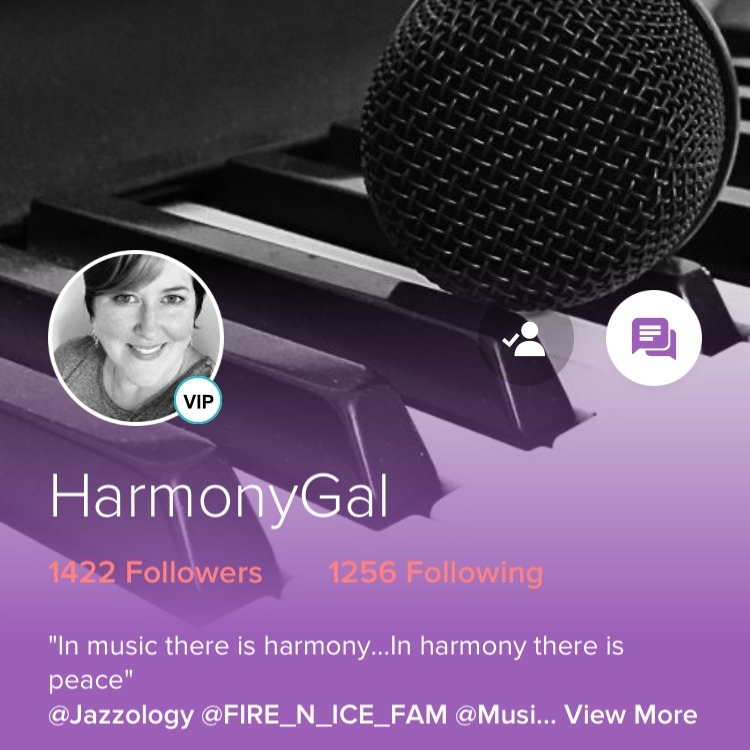
    And with the recently launched Club feature, users can now even create their own community space within the Sing.Salon community. 
    If you have any other feature requests or suggestions for the future, feel free to let us know in the forums. We are looking forward to year 2 of the Sign.Salon. 
    Smule just released version 6.0.1 for iOS. Here is an overview of the changes. 
    New Feature: Edit Songbook Tabs
    You can now customize the tabs in the songbook section of the Sing! app to your needs. Click the microphone symbol and scroll all the way to the right until you see a plus symbol. Click it and you will see a list of categories, such as musical genres and special categories such as Recommended, Popular, Trending and Unlocked. Using the checkmark symbol you can add or remove tabs. The entries at the top are your current tabs. You can also use the button on the left to change their order. 

    Redesigned Recording screen
    The settings you see while recording a song have changed. You can’t swipe anymore on the video to change the video filters. There is a new button on the bottom left to change the filter—but only for the songs you open yourself! Just as with group songs, the person opening the song now also controls the video filter for duets. The settings just show you which filter was used if you join. There is no option to change it anymore. 

    The button in the middle controls the audio filters and the button on the left gives access to the volume of your microphone and the guide track. 
    Some people couldn’t find the rewind and flag button anymore after the update. In order to access it, you need to drag the control panel (see left image) down and the rewind and flag button will appear again (right image). 
    New problems
    Users have reported problems with recording video. The video frame that is visible during the recording is not the same as after the upload. So you might have your head cut off. Smule has been made aware of the issue. Currently there is probably no other solution than to aim the camera somewhat higher during recording. We will update the article once the problem was fixed.
    People have also reported that the recently added Boost option is not available anymore. 
    Update: The video frame seems to fixed in version 6.0.5. In addition, the flag/rewind buttons have been made more visible again. 
    You are just starting out with video on the Sing! app? Here are some tips to make your videos look better. 
    First of all, you probably want to get a lot of light and you want it in front of you! Too little light is especially problematic with Smule videos, since they are compressed and the less light there is, the more compression artefacts you will see. 

    dark scenes or just background light and strong video compression don’t go well together
    So as a rule of thumb: unless you want to create a special mood for your song, you want a lot of light and you want the light to in front of you and diffused. The easiest way to achieve this is to just stand in front of a large window. (But not a window where the sun is directly visible from where you are standing.) So in this setting, you get diffused light from all sides and as a result, your face is well-light without any hard shadows. 

    Holding your phone all the time while standing in front of the window isn’t a perfect solution of course. A recommendable and also pretty cheap solution is to get a camera tripod and a separate phone clamp, which can be screwed into the tripod. You can get a very simple tripod, but make sure …
    it is high enough, so you can place the phone at least at the hight of your face or even better: a little bit higher.  it has a 3-way head, so you can use your phone in portrait mode—or you buy a phone clamp, which can be rotated. 
    A cheap but effective Sing! app setup
    If you also want to sing on rainy days and at night, the window tip might not work for you. In that case, consider a more professional solution. Get one, or better two so-called softboxes. They also produce the diffused light we want. You can get a set of two starting at around $60 (Amazon search link). Place the softboxes to the left and right of you and and somewhat higher than your head. This is basically the same setup a photographer would use for portrait shots. We don’t want a flash of course. So we need the continuous output light these softboxes provide. 

    The only downside of this setup is that it needs a lot of space. If that is a problem for you, you could also look into LED lights. They can provide a lot of light, but the light is not as diffused as with a softbox. So your skin won’t look as soft. Those LED lights come in different shapes, including ring lights, and they often include optional filters to influence the color of the lights. If the LED lights are rather bright, you can move them far away (to make the light more diffused) or even point them away from you at the walls or the ceiling to get diffused light. 

    Got any other lighting tips? What setup do you use? Feel free to let us know in the comment section below. 
    The Sing! app version 5.3.1 for iOS brings a lot of improvements for your profile page, especially for VIP users. Here is an overview of what has changed. 
     
    Background image/color
    You can now upload a background image for your profile page. In addition you can set one of five background colors. These options can be used individually or in combination. 

     
    Display name
    VIP users can now also set a display name. Once set, this will be shown as large text on your app profile page and your Smule username will be shown smaller below the display name. (see image above)
     
    Mentions
    Many singers use their profile text to link their groups and other singers. Now the app recognizes these mentions and shows a list of profile images as links below the text block. In case you don’t like this behavior, there is a new setting called “Display @mentions” on the settings page to turn the feature off. 

    Profile page with automatically linked accounts
     
    Pin a Song
    You can now pin a song on your profile page. This is a great way to show new visitors your favorite collab or to feature other singers you have sung with. To choose a song click the three dots next to the collab on your profile page or in your favorites list. The pinned song will be shown prominently and with al large cover image on your “channel tab” between your profile header and the list of your latest songs. Only one song can be pinned at a time. If you select a new one, the previously pinned song will be removed. 

    Previously only available in the US, the VIP subscriptions through smule.com are now available in over 100 countries around the world: http://bit.ly/getSmuleVIP
    Monthly and yearly subscriptions are available and usually cheaper than the respective prices in the Apple and Google Play store. And there is another advantage: VIP subscriptions bought through smule.com can be used on iOS and Android devices at the same time! 

    To purchase a VIP subscription on smule.com you need a credit card. This offer is not connected to the previous subscriptions bought in the Apple or Google Play store. You would have to cancel your current subscriptions there and buy a new VIP subscription on smule.com after your app store subscription has ended. 
    http://bit.ly/getSmuleVIP
    With version 5.0.9, the iOS version of the Sing! app gains a new video filter option: the so-called Blemish filter. It’s a live video filter, which detects smooth surfaces like your skin and adds a blur filter to make them appear even more smooth. 
    The effect can be turned on and off before, during or after a video recording. It works in combination with the existing filters like Selfie, Vintage and so on. 

    without (left) and with Blemish filter (right)
    Have you used the new option yet? How do you like it?
    We already published an article about uploading songs to Smule. But what if you don’t have karaoke versions of your favourite songs and you can’t record them yourself playing an instrument? Then you might try to remove the vocals from an original track. Here is an article about how this can be done. 
    But let’s be clear about it in advance: a perfect karaoke track is one that never had vocals to begin with. Unfortunately, there is no reliable way to remove vocals from any song. You can mute a voice track in the studio, but once the final recording is produced, the voice is mixed in with all the other instruments and hard to remove. 
    There are two basic principles to try it anyway: Isolating the voice through its frequency range and isolating the voice through its placement in the stereo panorama.
    Identifying and removing the frequencies of a voice is easy to do with an audio equalizer, but the problem is: the frequencies the singer uses, are usually also used by the instruments, so you would remove them as well. So for most songs, that doesn’t get us sufficient results. It might work to just lower the volume of the voice though. 

    If you have an audio editor with a spectral pitch display (see above) you could also use it to identify the individual notes of the singer and then delete them manually. But the process is quite cumbersome. So we rather focus on the typical way to create karaoke songs from original songs: the center cancellation method. 
    Removing vocals through center cancellation
    This method is based on the fact, that the voice and the instruments are usually distributed in a certain way across the stereo panorama, i.e. the left and right channel. The lead vocals are recorded in mono and almost always placed exactly in the center, while other instruments are either recorded in stereo or they are mono and placed somewhere on the left or right. If all that is the case, we can – in theory – easily isolate the lead vocals by just removing what is exactly in the center. This can be done in any audio editor, free or professional. You take the original track, split it in two tracks if necessary, and then reverse the phase of one track. As a result, what is played in the center will be played on both channels and through the phase change both channels will cancel each other out regarding the equal (center) parts. What was exactly in the center, is now removed. Here is a video tutorial for this technique using the free audio editor Audacity, which is available for Windows, Mac OS and Linux. But you can use this technique in almost any other audio editor and recording app as well. 
    But don’t be surprised if the results of this technique are usually rather disappointing. There are two main reasons for that:
    The voice usually has stereo reverb (or other stereo effects) added to it. Those effects act across the entire stereo panorama and are therefore not removed through the center cancellation technique. As an active Smule user you have probably heard lots of background tracks like that in the Smule community songbook.  Other instruments are usually also playing in the center and they are removed as well. So the background track will often sound rather flat and tinny.  Better results can be achieved if you use professional audio editors. They will also use the center cancellation technique, but they provide settings for it as stock option or through third-party plugins. So depending on the song, you have detailed control over the frequencies that get removed and the amount of space you remove from the stereo panorama. As a result, you can remove as much as necessary from the vocals, but keep as much as possible from the instruments. 


    Plenty of options in the “Center Channel Extractor” effect in Adobe Audition
    Whether or not the center cancellation technique works depends on the mastering of the specific song. Even for songs on the same album, it might work well for one track, but not at all for another. In my experience, the best results are achieved with uptempo pop and rock songs. The lead vocals have usually very little effects added and the instruments are distributed evenly across the stereo panorama. An acoustic song with a guitar and a voice on the other hand might not work at all. The instrument and the voice will usually share the same space in the stereo panorama and the same frequencies, so you can’t remove one without also muting the other. 
    But if you are missing a certain song in Smule, give this technique a try! With apps like Audacity you can even try it for free. 
    And feel free to let me know what your experiences with voice removal are! Which software do you use? What do you like about it? What are your tips and tricks?